
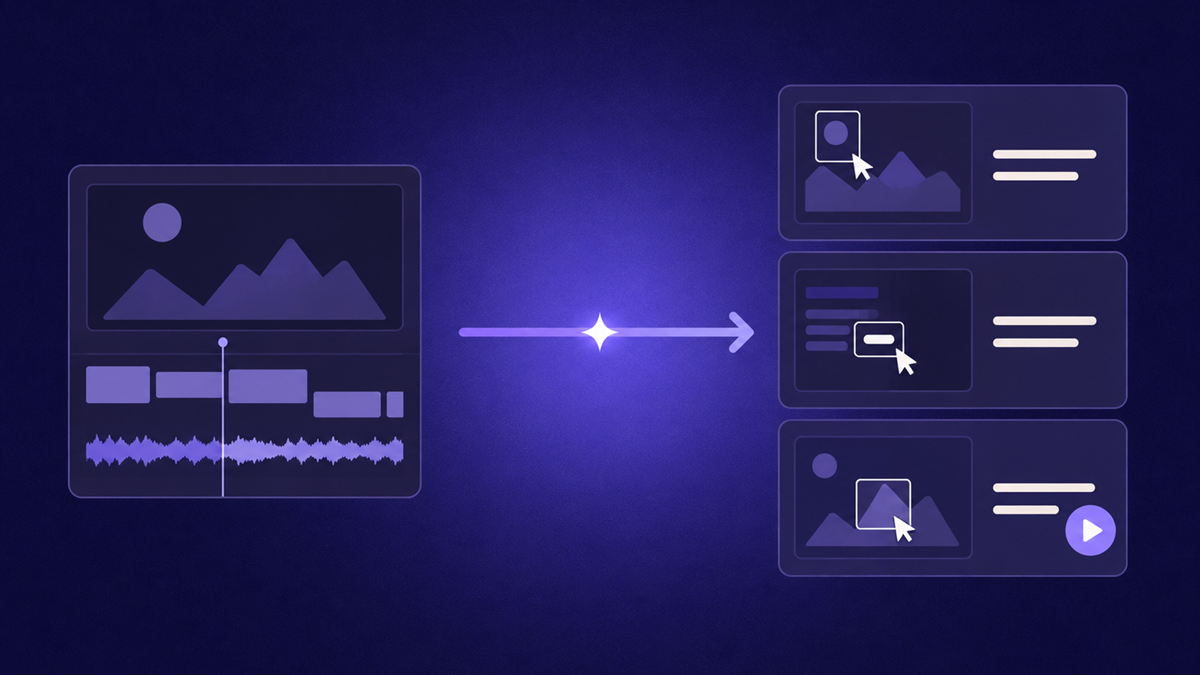
Here is how to make a tutorial video in eight steps. The process is the same whether you are teaching customers, training new hires, or documenting a task for your own team:
- 1Define one task. Finish the sentence after watching, the viewer can… and keep it narrow.
- 2Walk the click path. Do the task once and write down every click from start to done.
- 3Prepare a clean screen. Close extra tabs, silence notifications, and fix the window size.
- 4Do a silent dry run. Click through at recording pace to find the surprises first.
- 5Record and narrate. Say each action in the present tense as you perform it.
- 6Mark mistakes instead of restarting. Flag the slip, repeat the step, and keep going.
- 7Edit for attention. Cut mistakes, speed through dead air, and zoom on each click.
- 8Add voiceover, captions and a written guide. Then publish where people look for help.
The three-minute video below, from stepvideo's YouTube channel, shows one screen recording turned into a finished how-to video: a script, AI voiceover, zooms, captions and a written step-by-step guide, all from the same take. The rest of this guide explains each step so you can follow it with any tool.
Those eight steps fall into six stages: plan one specific task, script it loosely, record clean footage, edit for clarity, layer on voiceover and captions, then publish where your audience already looks for help. This guide walks through each stage with defaults that hold up for software walkthroughs, internal training, and customer education alike, and shows where automation now removes most of the timeline work.
What counts as a tutorial video?
A tutorial video teaches one repeatable task by showing the exact steps performed on screen, narrated clearly enough that a viewer can reproduce the result without you. It differs from a product demo, which persuades, and from a quick screencast message, which shares context. A tutorial succeeds only when the person watching can complete the task afterward.
How long should a tutorial video be?
As short as the task honestly allows, which for most software tutorials lands somewhere between ninety seconds and three minutes. The correct length is the time the real click path takes plus a few seconds of orientation at each phase. Anything longer usually signals scope creep rather than depth, and viewers abandon long videos long before they absorb them.
When a task genuinely needs more room, split it into chapters or a short series rather than one marathon take. Three focused videos beat one sprawling one: they are easier to record, easier to update when the interface changes, and easier for viewers to resume.
Where the video plays changes the target. These are the working defaults we use, not rules any platform enforces:
| Where it plays | Working target | Why |
|---|---|---|
| Inside your product (onboarding checklist, empty state) | Under 2 minutes | The viewer is in the middle of a task and wants to get back to it |
| Help center article | 1 to 3 minutes per task | One article answers one question, and the video should too |
| YouTube | As long as the task needs, with chapters past 5 minutes | Search viewers jump to their step, and YouTube builds chapters from timestamps in the description |
| Course or LMS lesson | 3 to 6 minutes per lesson | One objective per lesson leaves room for a practice task or quiz between videos |
| LinkedIn and other social feeds | Under 1 minute, linking to the full tutorial | Feeds autoplay without sound, so captions carry the message |
| Internal wiki or SOP | One task per video, usually under 5 minutes | People come back to it mid-task, so it has to be easy to scan |
One hard limit is worth knowing before you record a long walkthrough: YouTube caps uploads from unverified accounts at 15 minutes, so verify the channel first.
Tutorial video ideas for software and product teams
The best tutorial video ideas come from questions people already ask: support tickets, the onboarding step where new users stall, and the tasks new hires get wrong. Each idea below is one task, small enough for a single short video, grouped by who watches it.
For new customers
- Set up the account: connect the first integration, import existing data, or invite the first teammate.
- Reach the first result from an empty screen: the first project, report, invoice, or campaign.
- Change the setting customers ask about every week, such as notifications, time zone, or the billing contact.
For support and success teams
- Answer your three most frequent tickets with one video each, and put the link in the saved reply that answers each ticket.
- Fix a common error: show the message, say what causes it, then walk through the fix.
- Explain a dense screen one field at a time, such as a permissions matrix or an export dialog.
For releases
- One video per new feature, showing the task it makes possible rather than a tour of the new menu.
- Show what moved: when a redesign relocates a button, record the path to its new home.
For internal teams
- Back-office tasks: issuing a refund, approving an expense, provisioning access for a new account.
- A new hire's first week: requesting tools, finding the handbook, submitting the first timesheet.
- Hand-offs: record the task before the one person who knows it goes on leave.
To turn a list like this into a curriculum, see our guides to software training videos and customer onboarding videos.
How do you plan a tutorial people can follow?
Plan backwards from the finished state. Decide exactly what the viewer can do after watching, then walk the path yourself and write down every click between the starting screen and done. Ten minutes of planning prevents the most common recording failure: discovering halfway through that the workflow branches somewhere you did not expect.
- Scope to one outcome. Create an invoice is a tutorial. Everything about billing is a playlist.
- Fix the starting state. Know which account, view, and permissions you are recording from, and say them out loud in the first fifteen seconds.
- Write the click path. A numbered list of actions becomes your outline, your narration skeleton, and later the chapter structure of the video.
- Decide what to skip. Settings tangents and edge cases belong in a follow-up video or a linked document, not a mid-take detour.
The full production pipeline, start to finish
Here is the entire process as a repeatable procedure. Follow it in order and you will rarely need a second take.
- 1
Define the one task
Write a single sentence: after watching, the viewer can [do X]. If you cannot finish that sentence narrowly, split the topic into multiple videos before going further.
- 2
Walk the click path
Perform the task once without recording and note every action. This doubles as your rehearsal and your script outline.
- 3
Prep a clean screen
Close unrelated tabs, hide the bookmarks bar, silence notifications, and resize the window to one consistent size so every scene in the edit matches.
- 4
Do a silent dry run
Click through the whole flow once more at recording pace. Anything that surprises you here will confuse viewers twice as much.
- 5
Record the take
Narrate actions as you perform them, in present tense: click Reports, then choose Export CSV. Leave a short pause between phases, because those gaps become natural edit points.
- 6
Mark mistakes instead of restarting
If you flub a step, mark the mistake and keep recording. Tools like stepvideo excise the last eight seconds at the mark, so one slip never costs you the whole take.
- 7
Edit for attention
Cut marked mistakes, compress dead air, and apply a gentle push-in zoom on each clicked control. Those three moves create almost all of the perceived polish in a screencast.
- 8
Add voiceover, captions, and a written twin
Generate a per-step voiceover, burn in word-by-word captions, and produce the companion written guide from the same take so text and video never drift apart.
Script lightly: outlines beat screenplays
Write a bullet outline, not a word-for-word script. Verbatim scripts produce stiff reads, and they desync the moment the interface does something unexpected. Script only two things properly: the opening sentence, so you never ramble through the introduction, and any phrasing that must be precise, such as product names or compliance language. Narrate everything else live while you perform it.
Present tense matters more than it sounds. Click Export, then choose PDF maps one sentence to one visible action, which is exactly the granularity viewers need to follow along. Past-tense storytelling forces people to translate your words back into clicks, and translation costs attention.
Record clean footage
Setup quality caps final quality, and no editor rescues a noisy track or a chat notification landing on your dialog box. Run this checklist before every take:
- Use a dedicated browser profile with a neutral homepage and no personal bookmarks.
- Enable Do Not Disturb (Focus on macOS) so messages cannot photobomb the recording.
- Record at one consistent window size; uniform dimensions make zooms and crops behave predictably.
- Slow your clicks down noticeably from everyday speed, because what feels slow to you looks deliberate to viewers.
- Pause a beat after each major navigation so the new screen registers before you keep talking.
Gear is secondary to all of the above. A built-in microphone in a quiet room outperforms an expensive mic next to a loud fan. For a deeper pass on framing, cursor discipline, and presentation habits, see our guide to making screen recordings look professional, and if Chrome is your whole environment, Chromebooks included, start with how to screen record in Chrome.
How to make a tutorial video on Mac, Windows or a Chromebook
Every desktop system ships a free screen recorder, so you can make a tutorial video today without installing anything. The built-in tools give you raw footage; the editing that makes it easy to follow, such as zooms, captions and trimmed pauses, is still yours to do afterward.
On a Mac
Press Shift-Command-5 to open the Screenshot toolbar, then choose Record Entire Screen or Record Selected Portion. Open Options before you start and pick a microphone if you want your voice on the recording. Recordings save to the desktop by default, and QuickTime Player's File menu opens the same recorder. The first time a browser records a window or the whole screen, macOS asks you to allow it under Privacy & Security in System Settings.
On Windows
In Windows 11, press Windows logo key + Shift + R, or open Snipping Tool, select Record, then New. Drag over the area to capture, turn on the microphone toggle in the recording bar before Start if you want your voice, select Start, and select Stop when you finish. You can save the clip as it is or open it in Clipchamp to trim it. For a narrated recording with full control over audio sources, OBS Studio is free and runs on Windows, macOS and Linux.
On a Chromebook
Open Quick Settings, choose Screen capture, and switch from screenshot to screen record. The settings gear in the capture bar turns the microphone on before you start.
In Chrome, on any of them
If the task happens in a web app, a browser recorder works the same on all three systems. stepvideo's Chrome extension records a browser tab, a window or your whole screen while you talk, and click-accurate editing comes from tab capture: it zooms on each click, speeds through dead air, adds captions, and writes a step-by-step guide from the same recording.
Edit for clarity: manual timeline vs auto-editing
Editing is where most tutorial projects stall: the recording takes ten minutes and the timeline takes two hours. The table below compares the traditional manual approach with the auto-editing model stepvideo uses, where the editor already knows your intent because it watched the same workflow you did.
| Editing job | Manual timeline editor | Auto-editing (stepvideo) |
|---|---|---|
| Cutting mistakes and retakes | Scrub, split, and ripple-delete every slip by hand | Mark the mistake mid-take; the last 8 seconds are excised automatically |
| Dead air between actions | Find silences by ear, then trim or speed each one | Stillness of 4+ seconds is sped up 3× automatically; long stalls up to 8× |
| Zoom on clicks | Keyframe scale and position for every click individually | Applied on the clicked control automatically, up to 1.8× with eased ~600ms moves |
| Voiceover | Write, record, and sync a separate audio track | Written per step by AI and rendered with the video |
| Captions | Transcribe, align, style, and burn in | Word-by-word captions burned into the MP4 from the same take |
| Written companion guide | Usually a second deliverable authored separately | Generated from the same recording, screenshots extracted automatically |
Neither column is wrong. Manual editors give you frame-level control for cinematic marketing pieces. Auto-editing wins whenever volume matters: support and enablement teams produce tutorials weekly, and the real bottleneck is never the first video, it is the tenth.
Tools for making tutorial videos, free and paid
You can make a good tutorial video with free tools; what you pay for is time saved in editing. The table sorts the common options by what they leave you to do by hand. Third-party tools are named as examples of a category, without prices or plan limits, because those change faster than this page does.
| Option | Cost | Best for | What you still do by hand |
|---|---|---|---|
| Built-in recorders: macOS Screenshot toolbar, Windows Snipping Tool, ChromeOS Screen capture | Free, already installed | A quick raw capture of one short task | Every edit: trims, zooms, captions, voiceover |
| OBS Studio | Free, open source | Full control over scenes, sources and audio levels | Learning the setup, then editing in a separate app |
| Timeline editors, such as Camtasia or Descript | Free plans or trials, then paid; see each vendor's pricing page | Scripted, polished pieces that need frame-level control | Cuts, zoom keyframes, caption timing, syncing narration |
| Click-capture guide tools, such as Scribe or Tango | Free plans or trials, then paid; see each vendor's pricing page | Written step-by-step guides with screenshots | A narrated video, if your readers need one |
| stepvideo | 10-day free trial (5 AI minutes, no card, watermarked), then Creator at $29/month | Browser workflows that need a narrated video and a written guide from one take | Work outside the browser, and frame-by-frame edits (you edit steps instead) |
If you are choosing between dedicated products, our comparison of the best tutorial video software goes tool by tool, and stepvideo's plans are on the pricing page. If the budget is zero, start with free screen recorders that leave no watermark.
Add voiceover and captions
Narration carries what the cursor cannot: the why, the warnings, the edge cases. Two habits keep voiceover cheap. First, attach narration to steps rather than to a freeform audio track, so changing one step never forces a full re-record. Second, prefer a consistent synthetic voice when you plan to localize, because re-recording human narration across languages rarely survives contact with a release calendar. stepvideo writes an AI voiceover per step and can publish in 58 languages with matched voice, captions, and guide (see the language list). Our walkthrough on AI voiceover for videos covers the craft side.
To make a video tutorial with your own voice, you have two routes. Narrate live while you record, which sounds natural but keeps every stumble in the take, or record the screen first and add the voiceover afterward, which is easier to get right but harder to keep in sync with the clicks. Either way, use a headset or USB microphone close to your mouth in a quiet room. In stepvideo you talk while you record, and the narration is written per step from your own words, cleaned up, so a fumbled sentence does not cost a retake. For clean audio capture in the browser, see how to screen record a browser tab with audio.
Burn captions into the file rather than offering them as an optional track. Many people watch muted at work, skim ahead by reading, or rely on captions for accessibility. Word-by-word highlighting anchors each spoken phrase to the exact moment it applies on screen, which cuts down on rewinding. If you have never styled them before, our guide to adding captions to video walks the options.
Publish where the question gets asked
A tutorial nobody finds is storage cost. Embed the video beside the help article that covers the same task, attach it to support macros, drop it into onboarding emails, and collect related videos in a searchable portal. Pairing every video with a written guide matters more than most teams expect: people search text, not video, and a video knowledge base that indexes both serves both audiences, giving support deflection for customers and faster ramp-up for new hires.
Common tutorial video mistakes
Most weak tutorials fail in one of a handful of ways, and most of them can be caught before you publish. Check your next video against this list:
- Teaching three tasks in one video. Split it. A viewer looking for one answer will not scrub through the other two.
- A long introduction. State the result in the first sentence and start clicking. Give context at the moment the viewer needs it.
- Clicking at working speed. Fast cursor movement is hard to follow. Move deliberately and pause after each new screen loads.
- No zoom on small controls. A full desktop shrunk into an embedded player turns menus into unreadable text, so zoom in on the controls you click.
- Leaving dead air in. Waiting for a page to load is real time for you and wasted time for the viewer; cut the silence or speed it up.
- Personal data on screen. Customer names, email addresses and API keys appear in more recordings than anyone intends. Record from a test account and check every frame before publishing.
- No captions. Many viewers watch without sound, and captions let them skim to the step they came for.
- Never updating it. When the interface changes, an old video teaches the wrong clicks. Date each video and review it after every release that touches the workflow.
Frequently asked questions
A good tutorial video is mostly good editing applied to a calm, well-planned take. Scope one task, rehearse the path, record clean, then let automation handle zooms, dead air, and captions while you spend your energy on the explanation itself. Start with the single most requested how-to question in your support inbox and ship that one this week.
Frequently asked questions
What equipment do I need to make a tutorial video?
Less than most people expect. A laptop with a modern browser, the built-in microphone, and quiet surroundings cover screen-based tutorials completely. An external USB microphone improves narration if voice becomes central to your content, but cameras and lighting rigs are unnecessary when the screen itself is the visual. Spend the budget on time to plan and edit instead.
Can I make a tutorial video for free?
Yes. Every major platform ships a basic recorder: Chromebooks have Screen Capture built in, Windows has the Xbox Game Bar, and macOS has the Cmd+Shift+5 controls. Several free tiers exist across recording tools too. The usual tradeoff is editing, since raw captures lack zooms, tightened pacing, and captions. stepvideo has a 10-day free trial of 5 AI minutes and 5-minute recordings, with no credit card, if you want auto-editing before paying anything.
Should I script my tutorial or improvise?
Layer the two. Write a bullet outline of the click path so the structure is guaranteed, script only the opening lines verbatim, and improvise the connective narration while performing the task. Fully improvised takes wander and fill with filler sounds; fully scripted reads sound stiff and collapse when the interface surprises you. Outline plus live narration is what experienced creators converge on.
What resolution should I record tutorials at?
Record at your display's native resolution and keep the window a consistent size throughout. Readability depends far more on scaling behavior than on pixel count: a uniformly sized window scales predictably into any player, while a maximized ultra-wide desktop squeezed into a small embed turns menus into mush. Steady framing and large-enough text beat raw resolution every time.
Are captions really necessary?
Yes, and not only for accessibility. Many viewers watch muted in shared spaces, skim captions faster than they parse narration, or use captions to jump back to a missed step. Burned-in, word-by-word captions also anchor each spoken phrase to the exact moment it applies on screen, which makes rewinding less necessary. Treat captions as part of the tutorial, not an optional garnish.
How do I keep tutorials updated when the product changes?
Assume the interface will change and choose tools that make updates cheap. Edit-per-step tools let you re-script or re-order affected steps and re-render without reshooting. Date your videos, link each one to its written twin, and retire anything whose workflow no longer matches reality, because an outdated tutorial erodes trust faster than having no tutorial at all.
How do I make a tutorial video on a Mac or a Windows PC?
On a Mac, press Shift-Command-5, choose Record Entire Screen or Record Selected Portion, and pick a microphone under Options. On Windows 11, press Windows logo key + Shift + R, or open Snipping Tool and select Record. Both give you raw footage, so plan to trim, zoom and caption it afterward, or record in Chrome with a tool that edits the take for you.
How do I make a video tutorial with my voice?
Talk through each action as you perform it, in the present tense, with a headset or USB microphone close to your mouth in a quiet room. If live narration makes you stumble, record the screen silently and add a voiceover afterward. Tools that write narration per step, such as stepvideo, let you rewrite one step's script without recording the whole take again.